Curves
Gradient Tools can run a gradient along the length of a Curve object — no mesh conversion needed. It's ideal for hair, ropes, cables, roads and any procedural curve setup.
When a Curve object is active, a Curve Gradient panel appears in the Gradient Tools tab of the 3D Viewport.
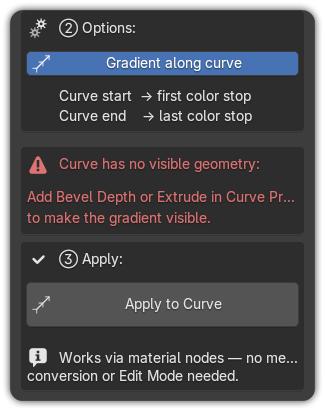
Apply a gradient to a curve
- Select a Curve object.
- Open the Curve Gradient panel.
- Pick a Target strip (a Gradient strip is the point here).
- Apply.
The strip's colors map onto the curve so the gradient flows from the curve's start to its end.
Gradient Along Curve
- On — the gradient runs along the curve (start → end). This is the usual choice.
- Off — the strip color is applied uniformly along the whole curve (useful for a flat color, or to drive a single solid tone).
Give the curve some surface
A bare curve has no thickness. Add a Bevel (Curve ▸ Geometry ▸ Bevel — a depth, a bevel object, or extrude) so the curve renders as a tube/ribbon and the gradient has a surface to show on.
How it works
The gradient is applied through a small node setup that maps the curve's built-in parameter (position along the curve, 0 → 1) to the correct cell of the palette texture. Because it's node-based, there's no mesh conversion and the curve stays fully editable.
Great for
- Hair cards and groom guides that fade root → tip.
- Ropes, cables and wires with a length-wise color change.
- Roads and paths that shift color along their run.