Material Looks
In Gradient Tools your palette colours become real, per-object materials. Instead of a single flat swatch, you pick a look — the way light plays on the surface — while the exact palette colour stays intact. One click, no node wrangling.
This is the successor to the old Shadeless / VFX mode: the lighting-independent flat colour you relied on is now the Flat look, joined by five more.
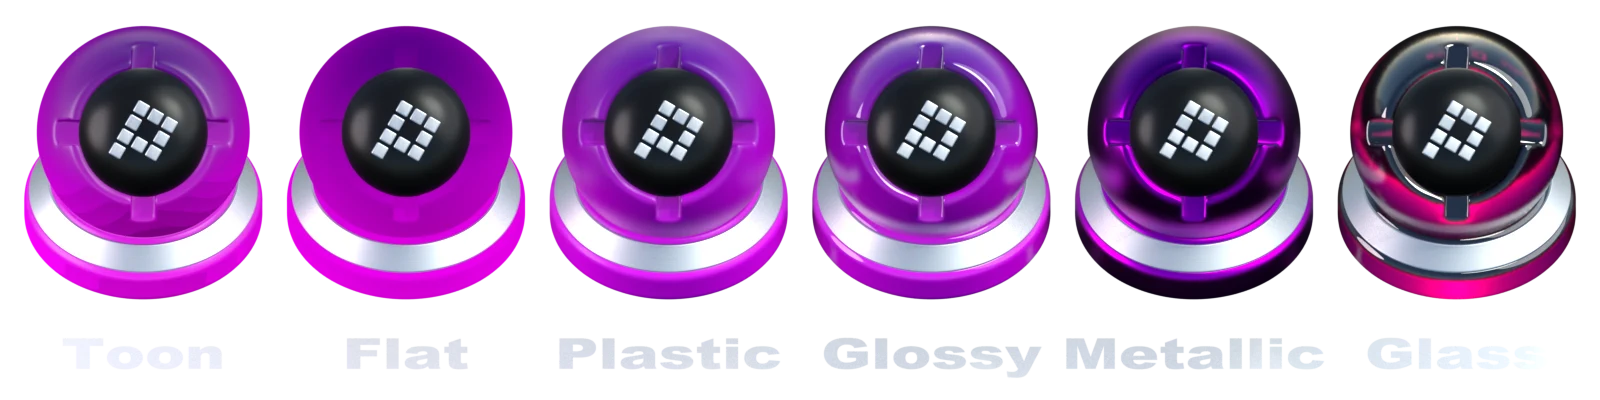
The six looks
Every look keeps the palette colour exactly and only changes how the surface responds to light.
| Look | What it looks like |
|---|---|
| Toon | Cel-shaded bands — a hand-drawn, stepped look. Lighting-independent. |
| Flat | Soft-shaded but keeps the hue; reads correctly without lights. The Shadeless successor. |
| Plastic | A believable matte-to-satin plastic surface. |
| Glossy | A clear-coat finish with a bright highlight. |
| Metal | A metallic, reflective surface. |
| Glass | A transmissive, refractive surface. |
Colour stays exact
Flat and Toon are lighting-independent: an emission-floor makes the palette colour read correctly even without lights in the scene. This preserves the old Shadeless promise — a client's exact colour comes out exactly as specified — but now on a surface with real 3D form.
Read the colour most exactly
Flat and Toon read most exactly in EEVEE with the Standard view transform. Set that in one click from the Color Management panel — Sidebar ▸ Gradient Tools ▸ Color Management — so tone mapping never darkens or shifts your palette colours.
Input = output
With Flat or Toon and the view transform set to Standard, the colour you picked is the colour that renders — change the scene lights all you want and the palette colour doesn't move.
Per-object, per-face
Looks live in native Blender material slots, so shading is owned per object — not per palette. One object can mix looks by face, and different objects keep independent looks and colours at the same time. Materials are per object, so tuning one object never disturbs another.
Where to find it
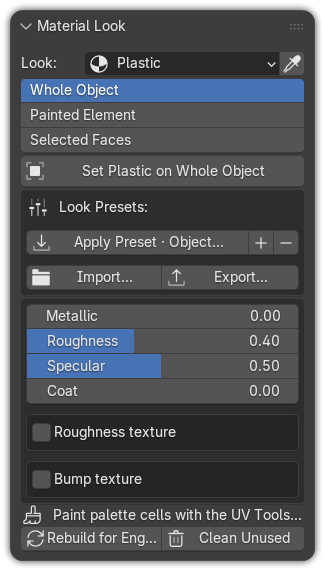
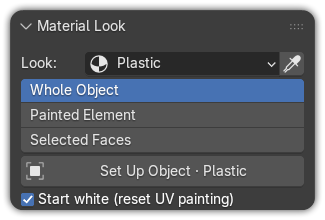
The Material Look panel lives in both the 3D Viewport and the Image Editor sidebars.
Location: Sidebar ▸ Gradient Tools ▸ Material Look.
The panel follows your selection — when the selected object (or the selected faces) carry a single look, it auto-selects that look so its parameters are editable right away, no hunting in a dropdown. You can turn this off with the Follow selection in Material Look preference (on by default).
Apply to Whole Object, Painted Element or Selected Faces
A target selector chooses the scope a look is applied to:
- Whole Object — the entire object.
- Painted Element — just the faces painted with the active strip.
- Selected Faces — the current face selection in Edit Mode.
A look changes shading, not colour
Applying a look keeps the object's own palette colours. It changes how the surface reacts to light, never the hue you painted.
Tunable parameters
Each look exposes the parameters that matter for it:
- Metallic
- Roughness
- Highlight / specular
- Coat
- IOR
- Transmission
- Emission-floor
- Toon band count (for the Toon look)
Procedural roughness & bump
Each look can optionally drive procedural roughness and bump channels — a noise texture feeding roughness and/or bump — with a live colour-ramp control to shape the result. Handy for scuffed plastic, brushed metal or frosted glass without leaving the panel.
Glass & EEVEE raytracing
The Glass look actually refracts in EEVEE: it automatically enables screen-space and ray-traced refraction. When the scene still needs it, a one-click Enable EEVEE Raytracing button turns on the required render setting.
Engines
Material Looks work in both EEVEE and Cycles. The Toon node graph is rebuilt for the active engine automatically, so cel shading looks right whichever renderer you use.
Coming from an old file
.blend files made with the old Shadeless Emission path are migrated to the Flat look
automatically on open — no manual steps and no data loss. The old shadeless and
bypass_strength toggles are gone; Flat carries the same lighting-independent colour forward.
Curve gradients are untouched.
Upgrading from GradientSmith or an older release
Migration runs on open, so old files just work — your palettes, painting and bakes are unchanged; only the material/shading layer evolved into the Flat look.
See also
- Look presets — save, apply, import and export looks as JSON, plus the five built-in presets and copy / link / eyedropper across objects.
- Materials & UV textures — assigning the material, per-object slots and switching an object's palette.