Project

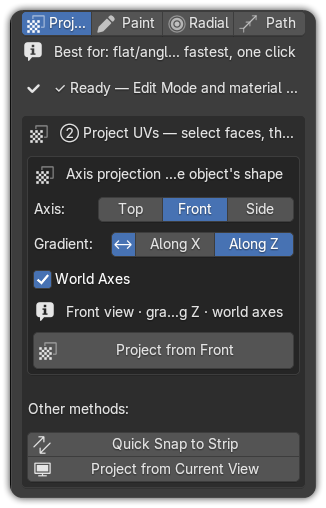
Best for: flat / angled faces — the fastest tool, one click.
Project maps your selected faces onto the target strip in a single action. It's the go-to tool for flat color-blocking and for laying a gradient down a principal axis.
Projection modes
Project offers three ways to decide how the UVs land on the strip:
Axis — Top / Front / Side
Projects from a principal orthographic view and preserves the object's silhouette on the strip. Pick the axis that matches the shape you want to color:
| Axis | Looks along | Keeps the silhouette of |
|---|---|---|
| Top | the Z axis (from above) | the X/Y outline |
| Front | the Y axis | the X/Z outline |
| Side | the X axis | the Y/Z outline |
For gradient strips, choose which in-plane direction the gradient runs with Gradient ▸ Horizontal / Vertical, and flip it along that direction with the Invert toggle. The result is predictable and repeatable — the same button gives the same result on two different objects.
World Axes
World Axes aligns the projection to the world. Turn it off to align to the object's own rotation instead.
Strip Centre (Quick Snap)
Instantly centers the selected strip on the selected faces — every face becomes the strip's color (or the middle of its gradient). Perfect for fast, piece-by-piece color-blocking of a hard-surface model.
Current View Angle
Projects a gradient using your current viewport angle. Orbit until you like the look, then project — what you see is the direction you get.
How to use it
- Edit Mode (Tab) → select the faces.
- UV Tools ▸ Project tab → pick a Target strip.
- Choose your mode (axis + gradient direction, Strip Centre, or Current View Angle).
- Click Snap UVs to Strip.
That's it — the faces snap to the strip immediately. No dragging, no preview to confirm.
Tip
Project is the natural partner of Flat strips: select a region, pick a color, snap. Repeat for each region to block in a whole model in seconds.