Path

Best for: gradients that follow a curved or branching shape.
Path builds a smooth gradient that flows along a multi-point line you draw across the mesh — great for ropes, roads, veins and seams that a straight line or circle can't follow.
How to use it
- Edit Mode (Tab) → select the faces to paint.
- UV Tools ▸ Path tab → pick a Target strip (a Gradient strip flows best).
- Click Activate Path Tool.
- Click to place control points along the shape you want the gradient to follow.
- Enter (or right-click) to apply.
The gradient runs from the first point to the last, following the path.
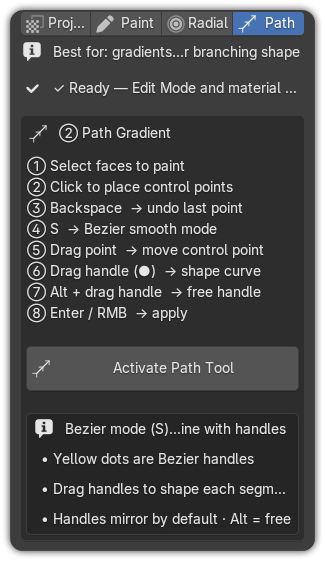
On-screen controls
| Action | Control |
|---|---|
| Place a control point | Click |
| Undo the last point | Backspace |
| Toggle Bézier smooth mode | S |
| Move a control point | Drag the point |
| Shape the curve | Drag a handle (●) |
| Free a handle (break the mirror) | Alt + drag handle |
| Apply | Enter / right-click |
| Cancel | Esc |
| Invert the gradient | F |
Bézier smooth mode
Press S to switch the path into a cubic Bézier spline with handles:
- Yellow dots are the Bézier handles.
- Drag handles to shape each segment of the curve.
- Handles mirror by default for smooth, continuous curves; hold Alt while dragging to make a handle free (for a sharp corner or an asymmetric bend).
Toggle smoothing on/off to compare the straight-segment and smooth-curve looks live before you commit.
Tip
Place just a few points for a gentle ramp, or many for a winding path. Use Bézier mode when the gradient needs to hug an organic, flowing shape.